We are insured and bonded
S99W12707 Loomis Drive, Muskego Wisconsin 53150Offices@purposecontracting.com

We are insured and bonded
S99W12707 Loomis Drive, Muskego Wisconsin 53150Offices@purposecontracting.comAn in-depth guide to the asphalt paving process, from site evaluation to final inspection.
Purpose and Public Notice: This report is written for property owners, managers and community members who want to understand how asphalt pavement is built, what each step should include, and what to check before, during and after the work. It is educational information, not legal or engineering advice. For a stamped design, a municipal specification, a geotechnical report or a contractor warranty, consult the appropriate professional.
The following questions are among the most commonly asked by property owners about the asphalt paving process. The answers draw on current market data, industry standards, and practical experience.
If you have any questions you'd like to be added to our FAQ, don't hesitate to get in touch with us through our request estimate page.
Asphalt performance is controlled by the entire pavement structure — subgrade, base, mix selection, bonding, placement, and compaction — not by the black surface alone. Across industry references, the consistent message is that quality is built before the asphalt truck arrives.
Items like base depth measurements, compaction documentation where applicable, mix tickets, compacted asphalt thickness, tack coat use, and density testing results on commercial work. The list that follows specifies what each one looks like and when to expect it.
No. Asphalt is the top layer of a layered construction sequence that includes subgrade preparation, base, binder course, and surface course, with controls at every step. Treating it as a one-day surface job is the single biggest cause of premature failure.
A real site evaluation — walking the property, recording existing conditions, measuring drainage paths, identifying soft spots, and defining what the pavement will be used for. A price quoted from a windshield view of square footage skips the work that determines whether the job will last.
Because the right pavement design depends on what will drive on it. A residential driveway carrying passenger vehicles has different requirements than a commercial lot used by garbage trucks, buses, or trailers. A contractor who quotes without knowing the use is guessing at the design.
No. Area matters for material quantities, but condition determines performance. Drainage, distress, edges, soft spots, utility structures, and adjacent surfaces all affect the cost and the long-term outcome. A square-footage-only quote skips the work that determines whether the job will last.
Because water affects almost every later decision. Ponding, runoff toward buildings, edge water, downspouts, clogged drains, and low spots can require grade changes, drainage structures, or design choices that change the scope and price.
Larger lots, steep sites, poor soils, frequent heavy vehicles, drainage structures, accessibility routes, public connections, and most commercial projects can justify an engineer or geotechnical evaluation. Residential driveways on stable soil usually do not.
Removal depth, base depth, compacted asphalt thickness, mix type, tack coat use, edge treatment, drainage corrections, utility adjustments, compaction method, testing responsibilities, and exclusions. "2 inches of asphalt" alone is not a scope.
Because water is the single largest cause of asphalt failure, and grade is what controls where water goes. Planning grades, drainage, permits, and utility coordination before construction prevents the most common long-term failures and protects the buildings around the pavement.
By matching the section — subgrade prep, base depth, asphalt thickness, and mix type — to the traffic, soil, drainage, and climate. AASHTO design methods and pavement engineering texts treat this as a balance between expected loads and the strength of the layers carrying them.
Grades are the elevations and slopes that determine where water goes, how vehicles transition, and whether garage doors and accessible routes still work. Grades should be planned on paper before equipment arrives, not adjusted by eye on placement day.
Pavement should generally move water away from structures unless a designed drainage system intercepts it. Downspouts, edges, retaining walls, and landscaped transitions all need consideration before paving, because water trapped against a building can damage foundations or freeze near doors.
Permits, utility locates, staging areas, traffic control, access needs, and work hours. Utility locating is essential before any excavation, undercutting, or drainage work. Manhole and valve box adjustments should also be scheduled.
Whether thickness will be checked, density will be tested, who decides if a soft area needs undercutting, how change orders are priced, and what happens if unsuitable soil is found. Discussing these before work begins prevents disputes later.
It depends on condition. Cracking, drainage, base stability, and elevations all influence whether the right answer is overlay, mill-and-overlay, partial patching, full-depth patching, full reclamation, or complete removal. A contractor who proposes only one option without inspecting the conditions is guessing.
Cleaning and overlaying, milling and overlaying, partial-depth patching, full-depth patching, full-depth reclamation, or complete removal and replacement. The right option depends on the condition of what is already there.
When cracks in an old pavement transfer up through a new layer placed over it, creating cracks in the new asphalt along the same pattern. Crack sealing, fabric interlayers, milling, or full-depth patching can reduce the risk, but no overlay is fully immune.
Because asphalt placed against a ragged, crumbling edge has nothing solid to bond to and creates a weak point. Saw cutting or clean edge milling produces straight joints, better transitions, and longer-lasting tie-ins to existing pavement, concrete, garages, or curbs.
Removed asphalt — called RAP (reclaimed asphalt pavement) — is often recycled into new asphalt mixtures or base applications. It must be processed and specified within quality-control limits, and disposed of legally if not recycled.
An inspection of the exposed area. Is the base stable? Are there soft spots? Did demolition reveal drainage problems? Does grade still allow the planned thickness? This is a critical checkpoint, because once new asphalt covers the area, problems become much harder to fix.
The subgrade is the prepared soil beneath the pavement. Every pavement reference treats it as fundamental because flexible pavements transfer loads down through the layers until the stress reaches the soil. A weak or wet subgrade will fail the pavement above it no matter how good the asphalt is.
Because soil compaction depends on moisture. Too dry, and particles cannot be densified. Too wet, and the soil pumps or weaves under equipment. AASHTO T 99 and T 180 define the moisture-density relationships used to set compaction targets.
Topsoil, roots, peat, organic soil, trash fill, saturated clay, frozen material, or loose uncontrolled fill. These compress, decay, or hold water, and should be removed or stabilized before any pavement is built over them.
A range of techniques — lime, cement, fly ash, asphalt emulsion, geogrids, or geotextiles — used to improve weak soils when removal is impractical. Each technique fits different conditions, and the right one depends on the soil type and project requirements.
Driving a loaded vehicle or piece of equipment over the prepared subgrade while observing for deflection, rutting, pumping, or soft areas. It's a practical field method used with engineering judgment to identify unstable support before covering it.
The base is a compacted layer of crushed stone between the subgrade and the asphalt. It distributes loads, supports the asphalt, helps create final shape, and assists drainage. A loose, thin, or contaminated base is one of the most common causes of premature asphalt failure.
It depends on traffic, subgrade strength, climate, and pavement design. A residential driveway on stable soil needs a different base depth than a commercial entrance or truck route. Anyone giving a universal "X inches" answer without seeing the site is guessing.
A lift is a layer of base material thin enough for the compaction equipment to densify through the full depth. A thick loose pile rolled on top can appear compacted at the surface while remaining loose below — which fails later.
Because the finished base controls both the asphalt thickness and the surface drainage. If the base is high, the asphalt may be too thin. If it has low areas, the surface may mirror them or require inconsistent thickness to correct.
Field specifications often require a target density tied to a laboratory compaction standard, or use proof rolling and visual acceptance for smaller jobs. Loose base is not a base — it is material waiting to shift.
There are different types. Mix design controls binder grade, aggregate gradation, air voids, and additives based on traffic, climate, layer thickness, and use. A driveway mix is different from a parking lot mix, which is different from a heavy-truck route mix. The right mix matters as much as the right thickness.
Asphalt binder coats the aggregate particles and provides flexibility, adhesion, and weather resistance. The aggregate skeleton provides most of the load-carrying structure. Binder grade is selected for the local climate so the mix resists rutting in heat and cracking in cold.
Because asphalt has a workable temperature window. Too cold, and it cannot be compacted properly. Too hot, and the binder can be damaged. Haul time, weather, traffic delays, and plant production all affect what shows up at the site.
Because the paving operation works best when production, trucking, paving, and rolling are balanced. Too few trucks starve the paver and create bumps. Too many trucks let mix cool. Coordination affects smoothness and density across the whole job.
When coarse and fine particles separate, creating areas of uneven texture, density, and permeability. Causes include poor stockpile handling, truck loading, long hauls, paver operation issues, or excessive hand raking — all of which produce visibly inconsistent surface texture.
Tack coat is a thin application of asphalt emulsion that bonds asphalt layers together or bonds new asphalt to an existing surface. FHWA guidance emphasizes that pavement layers must act together structurally; poor bonding causes slippage, delamination, and early cracking. It is a small step with a large performance consequence.
Because layers that do not bond can slip independently, leading to delamination, fatigue cracking, and reduced pavement life. FHWA tack coat guidance treats this as a foundational issue — the layers must act together to carry load as designed.
Yes. Dust, loose aggregate, mud, vegetation, or standing water interfere with adhesion. Milled surfaces should be swept, existing asphalt cleaned, and any concrete tie-in given special attention. Tack coat is not a substitute for cleaning.
Asphalt emulsion tack contains water that must evaporate and cure enough to leave the asphalt residue for bonding. Paving over unbroken tack interferes with the bond. Cool, humid, or shaded conditions slow the break and may require longer cure time.
It should be stated in the proposal where overlays or multiple lifts are involved. If a contractor says tack is unnecessary, you can ask why. There can be a valid reason in a specific application, but the answer should reflect pavement practice rather than a shortcut.
Placement is the part most people see — the paver laying down hot asphalt at a controlled thickness, with continuous movement, proper transitions, and weather-appropriate timing. The visible part of paving relies on every previous step being done correctly.
The base or milled surface accepted, drainage and utility structures adjusted or scheduled, edges and transitions established, tack coat cured and protected, equipment functional, mix arriving at temperature. Placement is not the start of the job — it is the visible part of work that began weeks earlier.
No — they place it slightly thicker, because asphalt compacts under rolling. The proposal should state compacted thickness, and the crew places enough loose material to achieve that thickness after compaction. Lifts should also be appropriate to the maximum aggregate size.
Pavers produce the smoothest mat when they move steadily. Stops and starts can create bumps, tears, texture changes, or temperature differentials. Some stopping is unavoidable on small jobs, but minimizing it improves the finished surface.
Where new pavement meets a garage slab, sidewalk, street, curb, drain, dock, concrete apron, or existing asphalt. Poor transitions create bumps, trip hazards, snowplow impacts, ponding, or edge raveling. Good transitions are smooth, thick enough to resist edge stress, and drain correctly.
No. Cold air, cold ground, wind, rain, and very hot temperatures all affect placement and compaction. Many agencies restrict paving based on surface temperature, air temperature, lift thickness, or precipitation. Paving outside those limits raises the risk of early failure.
Compaction reduces air voids, locks the aggregate together, and gives the asphalt its long-term strength. Under-compacted asphalt fails years earlier than properly compacted asphalt. On commercial and engineered projects, density testing verifies it; on residential jobs, the contractor's rolling pattern and the absence of soft spots are the practical indicators.
Because it gives the asphalt its actual strength. Compaction reduces air voids, locks aggregate together, and improves durability and water resistance. Asphalt that looks finished but was not compacted properly will fail years earlier than asphalt that was.
Because asphalt must be compacted while it is hot and workable. As the mat cools, the binder stiffens and aggregate becomes harder to rearrange. Rolling too late may crush aggregate. Rolling too aggressively too early may shove or crack tender mix.
Compaction commonly includes breakdown rolling, intermediate rolling, and finish rolling. Breakdown achieves most density at peak temperature, intermediate continues density gain, and finish rolling removes marks and produces the final surface texture.
Because they cool faster and are harder to confine than the middle of the mat. Low joint density allows water entry and early cracking, so proper joint construction and rolling sequence are critical. Edges may need support from shoulder aggregate, curb, or careful rolling.
Commercial, municipal, and engineered projects often require density testing using nuclear density gauges, non-nuclear gauges, cores, or laboratory bulk specific gravity, compared to theoretical maximum density. ASTM D2950 covers nuclear field testing; ASTM D2041 covers the laboratory reference value.
Function — not just appearance. Surface drainage, joint tightness, edge support, transition smoothness, utility structure alignment, and surface texture uniformity. A pavement that looks great but ponds water has not actually been finished.
It depends on mix, lift thickness, weather, and vehicle type. Passenger vehicles may be allowed sooner than heavy trucks. Hot weather keeps asphalt tender longer. Concentrated loads like trailer jacks, dumpsters, or sharp turns by heavy vehicles can mark new asphalt that would handle normal traffic fine.
The proposal, change orders, invoices, mix tickets if provided, warranty terms, photos of in-progress work, and maintenance instructions. Documentation matters later if there is any question about thickness, base, drainage, or warranty coverage.
Yes. Oxidation, UV, water, traffic, snowplows, deicers, and seasonal movement all affect service life. Maintenance can include sweeping, drainage cleaning, crack sealing, sealcoating where appropriate, patching, and overlays at appropriate intervals. Doing maintenance before distress becomes severe is far cheaper than rebuilding.
A good contractor walks the owner through the finished work, explains drainage, gives care instructions, names warranty limits, and stays accessible. A weak contractor disappears as soon as the surface looks acceptable. Accountability continues through the handoff — that's part of what you're paying for.
Yes — the checklist that follows summarizes the measurable, reviewable items that make a paving project accountable: project definition, drainage decisions, base thickness, asphalt thickness, compaction approach, and documentation. Use it before, during, and after your job.
Different distress patterns point to different causes. Ponding usually means a grade problem. Alligator cracking usually means fatigue or weak base. Raveling usually means low compaction or mix issues. Edge cracking usually means support problems. Identifying the cause matters more than just covering the symptom.
Twelve practical questions covering pavement section, drainage, thickness, compaction, mix, testing, warranty, and what happens if conditions change. The contractor's willingness — and ability — to answer them is itself a quality signal.
Treat asphalt paving as a sequence of accountable construction decisions, not as a one-day surface job. Start with the site, not the asphalt truck. Insist on drainage, subgrade stability, base compaction, and proper bonding before you ever talk about the surface. If a contractor cannot answer the questions in this guide, that is information you can use before you sign.
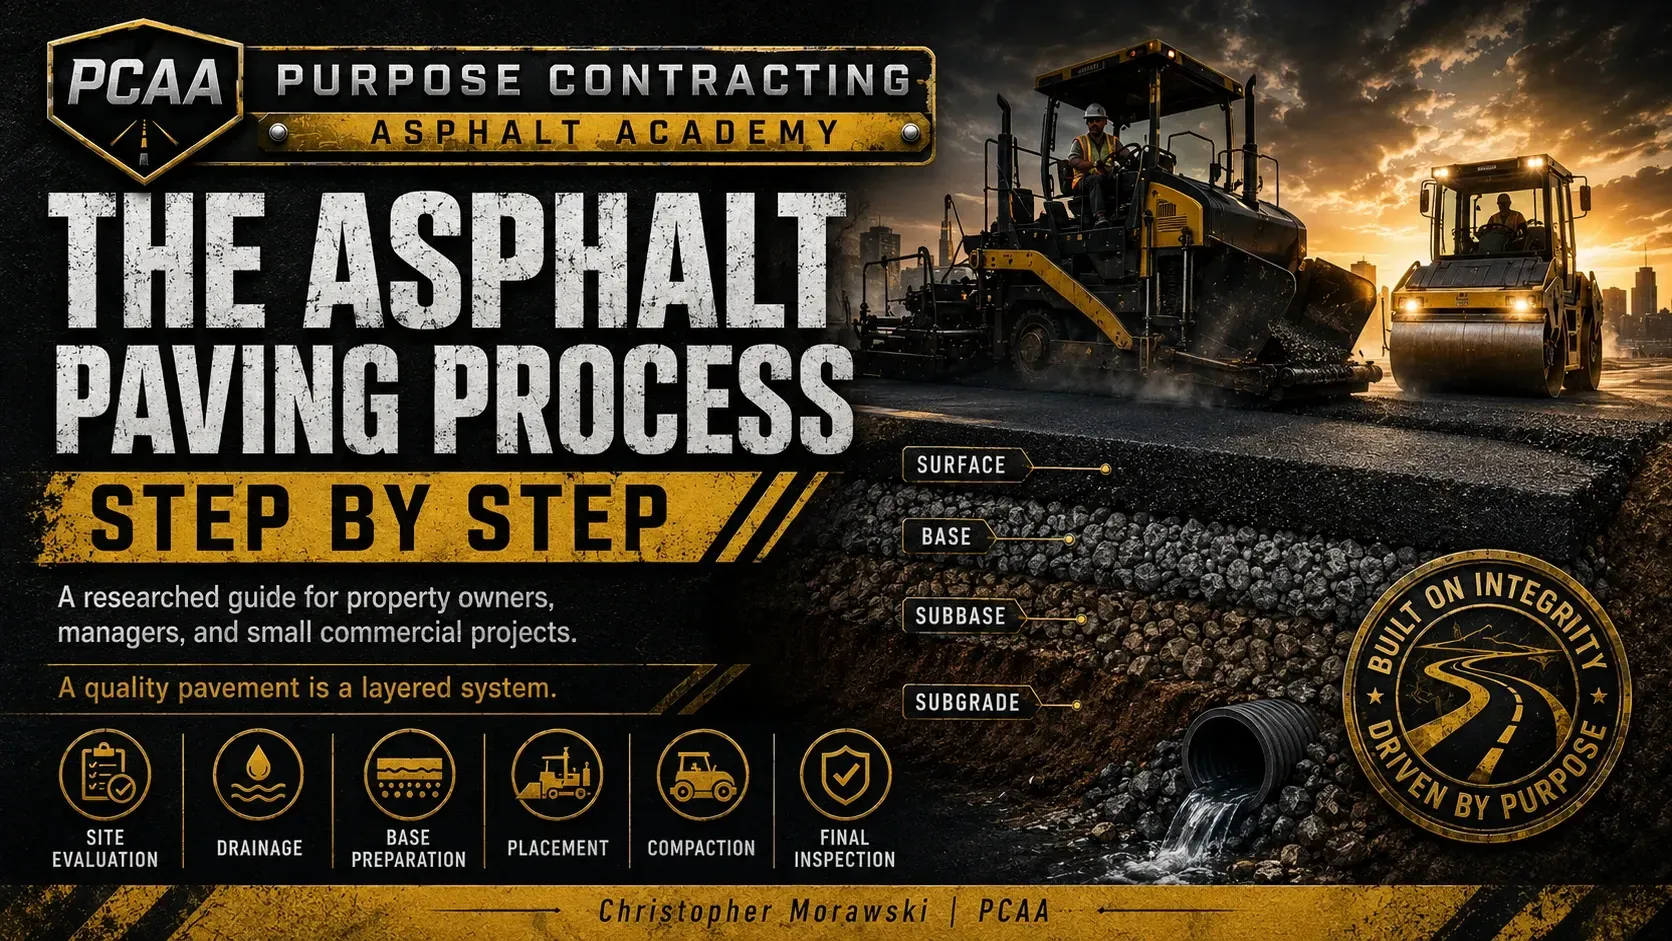
PCAA made this image for public use under the Creative Commons Attribution (CC BY) license.
This guide treats asphalt paving as a layered pavement system, not a surface-only job. Quality starts before any asphalt is placed, with planning, drainage, grading, subgrade preparation and base work, and continues through placement, compaction and final inspection. The owner-focused Q&A explains why weak support layers, poor drainage, thin base construction and inadequate compaction lead to cracking, settlement, potholes, rutting, rough transitions and premature wear. Each stage includes step-by-step detail, inspection points and citations to published industry and government sources.
This document is educational, not a substitute for a stamped pavement design, a local municipal specification, a state department of transportation standard, a project-specific geotechnical report, or a contractor warranty. Asphalt pavement design and construction requirements change with soil support, climate, drainage, traffic loading, available materials, accessibility rules, stormwater rules, and local codes. Numbers in this guide are presented as common industry ranges or decision points, not universal requirements. A good contractor or engineer should be able to explain which standards govern the specific project.
The strongest message across pavement references is that asphalt performance is controlled by the entire pavement structure, not by the black surface alone. Asphalt Institute manuals, the Hot-Mix Asphalt Paving Handbook, AASHTO pavement design guidance, and pavement engineering texts all treat asphalt pavement as a layered system designed to distribute wheel loads, protect the subgrade, manage water, and achieve density before traffic is allowed to use the finished surface [1], [2], [3], [6], [12], [13]. This matches the main point in the original draft: a paving job can look attractive on day one and still be structurally weak if drainage, support, bonding, thickness, or compaction were mishandled.
The second repeated theme is that water is one of asphalt pavement’s most consistent enemies. Water weakens soil support, enters cracks and poorly bonded layers, accelerates stripping in vulnerable mixes, and contributes to freeze-thaw damage in cold climates. It can undermine edges or low areas if it is not directed away. That is why planning, slope, base drainage, edge support, and surface runoff should be discussed before paving begins, not after puddles appear [1], [2], [6], [12].
The third theme is that compaction is not optional finishing work. It is a structural quality-control step. Asphalt must be compacted while it is hot enough for rollers to rearrange aggregate particles and reduce air voids. Many project specifications use density targets tied to theoretical maximum density, bulk specific gravity, or laboratory control values. Exact targets vary, but the principle is consistent: low density usually means higher permeability, lower durability, and shorter pavement life [2], [3], [10], [11], [15].
Finally, accountability comes from a written scope, measurable acceptance checks, and transparent documentation. A responsible estimate should describe existing-condition assumptions, removal depth, base thickness, asphalt lift thickness, mix type, drainage corrections, compaction approach, tack coat use, joint construction, testing responsibility, and early-care instructions. Property owners do not need to become pavement engineers, but they should be able to ask for the evidence behind the work.
Property owners and managers do not need to perform engineering analysis to hold a paving project accountable. A handful of measurable, documentable data points cover most of what determines whether a job was done correctly:
Compacted base thickness in inches, recorded after compaction (not loose placement).
Compacted asphalt thickness in inches, recorded after rolling (not the loose mat depth).
Mix type and source plant, with a mix ticket when one is available.
Tack coat use between asphalt lifts or over existing pavement, noted in the scope.
Subgrade acceptance method — proof rolling, density test, or visual inspection — with the result recorded.
Compaction method and roller types used on the project, with the rolling pattern visible to the owner.
Density testing results on commercial and municipal work, where the project specification requires it.
Drainage verification after rain, or water testing on suspect areas, before final acceptance.
Photo documentation of base, subgrade, edges, and tie-in transitions before the asphalt was placed.
Written warranty terms — duration, what is covered, what voids coverage.
IMAGE: Project scope table — asphalt paving quality-control checklist (asphalt-paving-quality-control-checklist-pcaa-muskego-wisconsin)
PCAA made this image for public use under the Creative Commons Attribution (CC BY) license.
Return to Page IndexMany people picture asphalt paving as the moment a truck delivers hot mix, and a crew spreads it across a driveway, parking lot, or road. That is the visible part of the project, but it is not the whole project. In professional pavement construction, asphalt is the upper layer of a system that includes the subgrade soil, compacted aggregate base or stabilized base, drainage features, asphalt binder and surface courses, joints, edges, and a maintenance plan. Each layer supports the next.
A simple way to understand asphalt pavement is to imagine a load-spreading stack. Vehicle tires apply pressure to the surface. The asphalt layer distributes some of that pressure. The base layer spreads it further. The subgrade soil receives what remains. If the soil is weak, saturated, loose, or poorly compacted, the asphalt layer may bend too much under repeated loads. Over time, that movement can show up as fatigue cracking, settlement, rutting, potholes, or edge failure. If water stands on the surface, seeps through cracks, or collects in the base, the support layers can lose strength. If the asphalt is not compacted enough, it can be too permeable and vulnerable to raveling, moisture damage, and early aging.
That is why a credible asphalt paving process follows a logical order. The site is evaluated. Use and traffic are defined. Drainage and grades are planned. The existing pavement is removed, milled, or prepared as needed. The subgrade is shaped and compacted. Weak areas are repaired. Aggregate base is placed, graded, and compacted. Tack coat is applied where bonding is needed. Asphalt mix is produced, delivered, placed, and compacted while workable. The finished work is inspected, protected during early service, and maintained over time.
The sequence matters because later steps cannot reliably fix skipped earlier steps. A smooth asphalt mat cannot correct a soft subgrade. A thick surface course cannot guarantee long life if water is trapped below it. A beautiful top layer can crack when placed over failed pavement without correcting the cause. Proper paving is therefore not about doing the most visible work the fastest. It is about building the right support system for the use the pavement will actually receive.
Return to Page Index%20The%20Anatomy%20of%20an%20Asphalt%20Pavement.webp)
PCAA made this image for public use under the Creative Commons Attribution (CC BY) license.
%20The%2010-Step%20Asphalt%20Paving%20Process.webp)
PCAA made this image for public use under the Creative Commons Attribution (CC BY) license.
%20What%20a%20Real%20Contractor%20Looks%20At.webp)
PCAA made this image for public use under the Creative Commons Attribution (CC BY) license.
Before a single dump truck arrives or a heavy roller hits the driveway, the long-term lifespan of your pavement is decided right here. A truly durable asphalt surface isn't just poured over the ground; it is a carefully engineered, layered system. Rushing through this initial phase is the fastest way to guarantee premature cracking, shifting, and structural failure down the road.
A successful commercial or residential project begins with a comprehensive site evaluation. This is a detailed assessment of the unique environmental, legal, and structural variables of your specific property.
The Golden Rule of Paving: A parking lot or driveway can look flawless on day one, but if the underlying engineering is flawed, it will fail. True quality begins from the ground up, not from the surface down.
During this critical phase, an expert contracting team evaluates several key factors to build a customized pavement design:
Existing Drainage & Slope: Identifying potential low spots where water naturally pools. Because water is asphalt’s primary enemy, planning the correct slope to direct surface runoff away from the pavement edges is paramount.
Soil & Subgrade Strength: Evaluating the load-bearing capacity of the native soil to determine the exact thickness and composition required for the stone base layer.
Expected Traffic Loading: Analyzing whether the surface will support light passenger vehicles, heavy commercial delivery trucks, or high-volume traffic, which dictates the structural design.
Regulatory & Local Codes: Ensuring the project aligns with local municipal specifications, regional stormwater management rules, and accessibility standards (such as ADA compliance guidelines).
Every successful paving project begins with the question, “What will this pavement be expected to carry?” A residential driveway used by passenger vehicles has a different risk profile than a commercial lot used by garbage trucks, delivery vehicles, buses, trailers, or repeated turning movements. Heavy loads matter because pavement damage is not simply proportional to vehicle count. Pavement engineering treats axle load repetitions as a major driver of structural design; heavier axles create much greater stress than light passenger vehicles [6], [12], [13]. Even on a small private project, the contractor should ask about use: daily parking, delivery access, dumpster service, snowplow activity, trailers, recreational vehicles, emergency vehicles, and turning or braking zones. For a commercial parking lot, this means the dumpster pad, delivery lane, and turn radius at the entrance often need a different pavement section than the rest of the lot.
This is where the owner should provide honest information. A driveway that occasionally supports a loaded moving truck may not need the same design as a commercial truck apron, but repeated heavy vehicles should change the discussion. Delivery areas, dumpster pads, loading zones, and tight turns often deserve thicker asphalt, stronger base, or concrete alternatives because slow-moving heavy vehicles can cause rutting, shoving, and surface deformation. If the scope ignores the actual traffic, the estimate may look attractive but still be underbuilt.
A reliable estimate should not be based only on square footage. Area matters for material quantities, but condition matters for performance. The contractor should document drainage patterns, pavement distress, edge failures, soft spots, utility structures, curb lines, building thresholds, garage floors, adjacent concrete, landscape edges, low areas, and evidence of previous repairs. Photographs are useful because they create a record of visible conditions before work begins. A square-footage-only estimate or windshield quote skips the conditions that determine whether the pavement will last five years or twenty.
Existing cracking patterns can suggest different causes. Longitudinal cracks may relate to joints, edge support, settlement, or reflective cracking. Alligator cracking often suggests structural fatigue or weak support. Depressions can indicate consolidation or base/subgrade failure. Raveling may point to aging, insufficient compaction, segregation, moisture damage, or surface wear. Rutting can come from asphalt mix instability, inadequate compaction, weak base, or weak subgrade. The purpose of evaluation is not to diagnose every defect perfectly from the surface. It is to identify which problems must be investigated before simply placing new asphalt over old, distressed areas.
Drainage should be discussed at the first visit because water affects almost every later decision. The owner and contractor should look for ponding, runoff toward buildings, water trapped at edges, roof downspouts discharging onto pavement, clogged or undersized drains, and low spots that cannot be corrected without changing the grade. Pavement engineering references consistently treat moisture control as essential because saturated support layers lose strength and surface water accelerates deterioration when it enters cracks or permeable pavement [1], [6], [12], [13]. In Wisconsin and other freeze-thaw climates, this matters even more. Water that enters cracks or saturates the base will freeze and expand each winter, accelerating failure that may not appear until the second or third spring after paving. Wisconsin's annual freeze-thaw cycles make moisture control particularly consequential — saturated subgrade that survives the first summer can still heave or pump after a hard winter.
A practical site evaluation should ask where water starts, where it travels, where it exits, and whether that path is legal and safe. Sending runoff onto a neighboring property, into a building, over a sidewalk where it freezes, or toward an unprotected slope can create new problems. On commercial projects, stormwater permits or local drainage approvals may apply. In the United States, construction activities that disturb one acre or more, and smaller sites that are part of a larger common plan of development, often require stormwater controls under federal and state permitting programs. Local requirements can be stricter, so the contractor should confirm who is responsible for erosion control, inlet protection, sediment tracking, and final stabilization [17]. In southeast Wisconsin, this can include municipal stormwater requirements in Milwaukee, Waukesha, Racine, and Kenosha counties — each with its own thresholds and review timelines.
Return to Page Index%20Decision%20Tree%202.%20When%20Do%20You%20Need%20an%20Engineer.webp)
PCAA made this image for public use under the Creative Commons Attribution (CC BY) license.
Many small driveways are completed using local contractor experience and standard residential practices. Larger parking lots, steep sites, poor soils, frequent heavy vehicles, drainage structures, accessibility routes, public connections, and commercial projects may justify an engineer or geotechnical evaluation. A pavement engineer can convert traffic assumptions, soil strength, drainage conditions, and material properties into a pavement section. Geotechnical input can identify unsuitable soils, groundwater risks, frost-susceptible materials, expansive clay, or organic soil that should not be paved over without correction.
The need for professional design increases when the cost of failure is high. A failed residential driveway is inconvenient and expensive. A failed commercial loading zone can disrupt operations, create safety hazards, and require reconstruction while customers or tenants are present. Planning cost can be small compared with tearing out a failed pavement because the original scope ignored weak support.
Return to Page Index%20What%20a%20Real%20Written%20Scope%20Looks%20Like.webp)
PCAA made this image for public use under the Creative Commons Attribution (CC BY) license.
A written scope should describe more than “install asphalt.” It should identify removal depth, base depth, asphalt thickness after compaction, mix type if known, tack coat use, edge treatment, drainage corrections, utility adjustments, compaction method, testing responsibilities, and exclusions. The phrase “2 inches of asphalt” can be ambiguous unless it states compacted thickness. Base thickness should also be specified after compaction, not just loose placement. If the proposal does not state whether the contractor is adding base, reusing base, milling, overlaying, or removing failed areas, the owner cannot compare bids fairly.
Good planning makes the rest of the process measurable. It creates the baseline for inspection, change orders, and warranty conversations. Without a written scope, disputes often become subjective: the owner expected structural repair, while the contractor priced a surface overlay. Step 1 should prevent that mismatch.
Return to Page Index%20Where%20Water%20Goes%20on%20Your%20Pavement.webp)
PCAA made this image for public use under the Creative Commons Attribution (CC BY) license.
Once the initial site data is gathered, those insights must be translated into a precise engineering blueprint. This phase is where abstract planning meets real-world pavement geometry. Designing the proper grades and slope elevations ensures that gravity works for your pavement rather than against it, systematically routing surface water away from vulnerable edges and into designated management systems. Furthermore, establishing rigorous preconstruction controls sets the exact physical benchmarks and elevations that the excavation and paving crews will follow — leaving zero margin for error before the first piece of heavy machinery even fires up.
Key Focus: You cannot fix a bad slope with a thick layer of asphalt. This phase locks in the foundational layout required to prevent standing water, compliance failures, and structural shifting.
Elevation Blueprinting: Setting exact grade lines to guarantee a minimum slope percentage for optimal water runoff.
Catch Basin Alignment: Coordinating the surface grade with existing or new drainage infrastructure to eliminate pooling.
Physical Benchmarks: Establishing permanent reference points on-site so the grading crew maintains absolute depth accuracy during excavation.
Return to Page Index%20Driveway%20vs.%20Parking%20Lot%20vs.%20Truck%20Route.webp)
PCAA made this image for public use under the Creative Commons Attribution (CC BY) license.
After the site is evaluated, the project needs a construction approach. Pavement design can be simple or complex, but the underlying idea is consistent: match the pavement section to the traffic, soil, drainage, and climate. AASHTO design methods and pavement engineering texts describe pavement design as a balance between loads, materials, reliability, drainage, and serviceability [6], [12], [13]. On small private projects, the design may not involve formal traffic calculations, but the contractor should still distinguish light-duty, medium-duty, and heavy-duty areas.
For example, a parking stall area may experience slow passenger vehicles, while the drive lane next to a dumpster may experience heavy trucks turning in a tight space. It is common for commercial lots to use different pavement sections in different areas. Treating the entire site as one uniform light-duty pavement can save money up front but create early failure in the highest-stress zones. A responsible scope identifies these areas before work starts. On Milwaukee-area commercial sites and Waukesha County industrial lots, those high-stress zones are usually where pavement starts failing first if the section was designed for the average rather than the worst case.
Return to Page Index%20Plan%20Grades%20on%20Paper%2C%20Not%20on%20Dirt.webp)
PCAA made this image for public use under the Creative Commons Attribution (CC BY) license.
Grades are the elevations and slopes that control how the finished pavement fits into the property. They determine whether water leaves the surface, whether vehicles transition smoothly, whether doors and garage entries remain usable, and whether accessible routes comply with applicable rules. Grades should be planned before excavation because lowering or raising one area affects surrounding areas. A contractor may need to balance drainage slope with building thresholds, curbs, sidewalks, garage slabs, loading docks, drains, and property lines.
Surface slope requirements vary. Many parking and driveway projects aim for positive drainage, often with slopes around 1 percent to 2 percent where site conditions allow, but local standards, accessibility requirements, and project conditions govern. Slopes that are too flat may pond. Slopes that are too steep may create vehicle scraping, difficult walking conditions, drainage velocity problems, or winter icing hazards. The accountable point is not one universal slope number. The accountable point is that the proposal should explain how water will move and how the finished pavement will connect to fixed elevations.
Buildings, garages, retaining walls, and landscaped edges deserve special attention. Pavement should generally move water away from structures unless a designed drainage system intercepts it. If water is trapped against a building, it can enter foundations, freeze near doors, or soften the edge of the pavement. Downspouts should not discharge uncontrolled water across the pavement when a better drainage path is available. Curbs, swales, trench drains, catch basins, and edge grading can all be part of the solution.
Edge support is also a drainage issue. Asphalt edges without confinement can break down if water erodes the shoulder or if vehicles drive off the edge. Rural driveways and private roads often benefit from compacted shoulders that support the pavement edge. Parking lots may use curbs, stabilized shoulders, or adequate aggregate beyond the asphalt edge. When edge support is ignored, the first visible failure may be crumbling sides even though the center of the pavement looks sound.
Return to Page Index%20The%20Pre-Construction%20Logistics%20Checklist.webp)
PCAA made this image for public use under the Creative Commons Attribution (CC BY) license.
Before construction starts, the owner and contractor should identify permits, utility locates, staging areas, traffic control, access needs, and work hours. Utility locating is essential before excavation, undercutting, base repair, or drainage work. Manholes, valve boxes, cleanouts, catch basins, electrical structures, and irrigation components may need to be protected or adjusted to final grade. If a utility cover is left low, snowplows can catch it and vehicles can hit it. If it is left high, it can become a bump or drainage obstruction.
Logistics affect quality because asphalt is temperature-sensitive. Long truck delays, poor access, hand-carrying material too far, or paving in poorly planned sequences can reduce the time available for compaction. The Hot-Mix Asphalt Paving Handbook emphasizes coordination among production, trucking, placement, and rolling because the paving train must stay balanced [3]. A small project still benefits from that discipline. The crew should know where trucks will enter, where material will be placed first, how joints will be arranged, and how traffic will be kept off the work.
Return to Page Index%20Overlay%20vs.%20Mill-and-Overlay%20vs.%20Full%20Removal.webp)
PCAA made this image for public use under the Creative Commons Attribution (CC BY) license.
Quality expectations should be discussed before work begins. Will thickness be checked? Will density be tested? Who decides whether a soft area needs undercutting? What happens if unsuitable soil is found? Are change orders priced by unit cost, time and material, or negotiated lump sum? Will the contractor provide mix tickets from the asphalt plant? Will the owner receive maintenance and early-care guidance? These questions turn a vague paving project into a managed construction project.
For larger or commercial projects, acceptance may include field density testing, core thickness measurements, smoothness checks, tack coat inspection, base density reports, or engineer observation. Smaller projects may rely on contractor workmanship and owner observation, but the same categories still apply. Good work is easier to verify when the standard is written down.
Return to Page Index%20Decision%20Tree%201.%20Patch%2C%20Overlay%2C%20or%20Replace.webp)
PCAA made this image for public use under the Creative Commons Attribution (CC BY) license.
With the engineering benchmarks and drainage grades firmly established, it is time for the heavy machinery to clear the way. You cannot build a durable, long-lasting pavement system over a cracked, shifting, or structurally compromised foundation. Whether your project requires stripping away decades of failed pavement down to the native soil or precision-shaving the top layer to prepare for a fresh overlay, this stage is all about creating a clean, stable canvas. Failing to properly prepare the existing surface ensures that old cracks and structural defects will quickly “reflect” upward, ruining your brand-new asphalt.
Engineering Insight: The choice between full demolition and asphalt milling depends entirely on the health of your existing subbase. If the foundational stone layers are still structurally sound, milling saves significant time and budget. If the underlying base has failed, complete removal is non-negotiable.
Depending on the specific scope and condition of your site, this phase will utilize one of three primary preparation methods:
Full-Depth Demolition and Removal: Completely breaking up and hauling away old asphalt and concrete using excavators and dump trucks to fully expose, inspect, and amend the subgrade from scratch.
Asphalt Milling: Utilizing a specialized milling machine to shave off a precise depth (typically 1.5 to 3 inches) of the deteriorated surface layer. This leaves behind a highly textured, structurally sound base that is perfectly graded and ready to cross-bond with new asphalt.
Surface Preparation (Overlay Prep): For pavements that are structurally intact but cosmetically worn, this involves aggressive power-sweeping, routing and filling remaining cracks, patching localized potholes, and applying a specialized adhesive tack coat to ensure the new layer permanently sticks to the old one.
The old surface must be handled according to its condition. Not every project requires full removal. Not every project is suitable for a simple overlay. The basic options include cleaning and overlaying, milling and overlaying, partial-depth patching, full-depth patching, full-depth reclamation, or complete removal and reconstruction. Pavement recycling and rehabilitation references describe these methods as different tools for different failure conditions [5], [18].
A simple overlay can be reasonable when the existing pavement is structurally sound, drainage is acceptable, grades allow additional height, and cracking is limited or properly treated. Milling and overlaying are useful when the top layer is worn or oxidized, but the lower structure remains usable, or when the project must preserve curb reveal, door clearances, or drainage elevations. Full-depth repair is needed where failures extend through the asphalt and base. Full reconstruction is appropriate where the existing pavement system is too weak or poorly drained to support new asphalt.
Return to Page Index%20How%20Reflective%20Cracking%20Happens.webp)
PCAA made this image for public use under the Creative Commons Attribution (CC BY) license.
One major risk of overlaying old pavement is reflective cracking. Cracks in the old pavement can move under thermal changes and traffic, causing the new layer above to crack along the same pattern. Crack sealing, fabric interlayers, stress-absorbing membrane interlayers, milling, or full-depth patching may reduce risk, but severe structural cracking cannot be solved by a thin surface layer alone. The owner should be cautious when a contractor proposes to “cover it up” without explaining why the existing distress occurred.
Hidden failures are also common. A depression may look small until the old asphalt is removed and the crew finds wet base, organic material, utility trench settlement, or poorly compacted fill. The proposal should say how such discoveries will be handled. Responsible contractors often include unit prices or allowances for undercutting and replacement because they cannot always know the full condition before removal.
Return to Page Index%20Clean%20Edge%20vs%20Ragged%20Edge.webp)
PCAA made this image for public use under the Creative Commons Attribution (CC BY) license.
Demolition should create a stable, buildable area. Saw cutting or clean edge milling helps produce straight joints and better transitions to existing pavement, concrete, garages, aprons, or curbs. Ragged edges can crumble and create weak points. Loose material should be removed because asphalt placed against unstable debris cannot bond or compact properly. When only part of an area is patched, the patch edge should be cut to sound material rather than feathered into broken pavement.
Milling should be deep enough and uniform enough to remove the intended layer while preserving useful structure below. The milled surface should be swept clean before tack coat and paving. Milling dust, loose aggregate, and debris reduce bonding. Inadequate cleaning is one reason overlays can slip, delaminate, or fail prematurely.
Return to Page Index%20RAP%20How%20Recycled%20Asphalt%20Gets%20Reused.webp)
PCAA made this image for public use under the Creative Commons Attribution (CC BY) license.
Removed asphalt is often recyclable. Reclaimed asphalt pavement, commonly called RAP, is widely reused in asphalt mixtures or base applications when processed and specified properly. Recycling can reduce virgin aggregate and binder demand, but it must be managed within mix design and quality-control limits [5], [14], [15]. On a private project, the owner does not need to manage RAP design, but should expect removed material to be hauled to an approved facility or reused in a lawful manner.
Concrete, soil, contaminated material, and demolition debris may have separate disposal requirements. If a site has fuel spills, industrial use, or suspicious odors or staining, environmental investigation may be needed before excavation. The cheapest disposal path is not always legal or responsible.
After removal or milling, the crew should inspect what has been exposed. Is the base stable? Are there soft areas? Did demolition reveal drainage problems? Does the grade still allow the planned asphalt thickness? Are utilities at the right elevation? This is a critical checkpoint. Once new asphalt covers the area, it becomes harder to correct support problems. The best time to repair weak material is when the pavement structure is open.
The owner should pay attention to whether the crew treats preparation as a separate stage or rushes directly to paving. Good preparation may not be visually impressive, but it is one of the most important reasons the finished surface lasts.
Return to Page Index%20What_s%20Hiding%20Under%20Your%20Driveway.webp)
PCAA made this image for public use under the Creative Commons Attribution (CC BY) license.
With the old surface cleared away, the focus shifts to the true foundation of your entire pavement system: the subgrade. The subgrade is the native soil beneath the driveway or parking lot, and its load-bearing capacity dictates exactly how long your asphalt will survive. Even the thickest asphalt and stone base will quickly sag, rut, and crack if the underlying soil cannot support heavy wheel loads. Evaluating and preparing this layer ensures a uniform, rock-solid platform that eliminates future settlement and resists the shifting forces of changing seasons.
The Foundation Principle: If you pave over uncompacted, wet, or unstable native soil, you are essentially building on borrowed time. A flawless subgrade is what transforms a temporary surface into a decades-long pavement asset.
To guarantee the native earth is structurally sound, an expert crew performs several strict quality-control checks and preparations:
Proof Rolling: Driving a heavily loaded dump truck over the exposed soil to visually identify “deflection” — any soft spots, flexing, or rutting that indicates hidden underground instability or trapped moisture.
Moisture Control & Heavy Compaction: Testing and adjusting the moisture level of the soil so it can be mechanically compacted to strict density targets using heavy vibratory rollers.
Subgrade Stabilization: In areas with poor, high-clay, or organic soils, implementing corrective actions such as undercutting (excavating the bad soil) or laying down heavy-duty woven geotextile fabric to distribute weight and prevent mud from pumping up into your clean stone base.
The subgrade is the soil or prepared earth surface beneath the pavement structure. It may be natural soil, compacted fill, stabilized soil, or a combination. Pavement design references treat subgrade support as fundamental because flexible pavements distribute loads through layers until stress reaches the soil [6], [12], [13]. If the soil is weak, saturated, frost-susceptible, expansive, organic, or poorly compacted, the pavement above it is vulnerable.
A strong asphalt layer over a poor subgrade can still fail. The surface may crack because the soil moves. It may settle where utility trenches were not compacted. It may rut where wet clay loses strength. It may heave in freeze-thaw climates. Subgrade preparation is therefore not dirt work in a casual sense. It is structural work.
Soil compaction depends heavily on moisture. Too dry, and soil particles may not rearrange into a dense structure. Too wet, and the soil may pump, weave, or lose strength under equipment. Laboratory compaction methods such as AASHTO T 99 and T 180 establish relationships between moisture content and dry density for soil and aggregate materials. Field specifications often require a percentage of laboratory maximum dry density at or near optimum moisture, but exact requirements vary by material and project [8]. In southeast Wisconsin, the spring thaw often leaves clay subgrades saturated for weeks, which is one reason experienced contractors avoid placing base or asphalt during early April unless conditions allow.
For property owners, the visible clue is whether the soil supports equipment without rutting or pumping. If a roller or loaded truck causes the subgrade to wave, deflect, or push water, paving should not proceed until the problem is corrected. Options include drying, aeration, undercutting, adding suitable fill, chemical stabilization, geotextile separation, or drainage improvements. The correct option depends on soil type and severity.
Unsuitable material can include topsoil, roots, peat, organic soil, trash fill, saturated clay, frozen material, or loose uncontrolled fill. These materials should not remain in the pavement support zone unless specifically evaluated and stabilized. Organic soils decay and compress. Topsoil holds water. Trash fill can settle unpredictably. Frozen material thaws later and loses volume. The pavement may look fine at first and then settle as the weak material changes.
Undercutting means excavating weak material and replacing it with suitable compacted material. The depth may be a few inches in isolated soft spots or much more in severe conditions. Undercutting is often handled by a change order because the full extent may not be visible until excavation begins. This is another reason Step 1 should define how unforeseen conditions will be priced and approved.
Return to Page Index%20Four%20Ways%20to%20Stabilize%20Weak%20Soil.webp)
PCAA made this image for public use under the Creative Commons Attribution (CC BY) license.
Stabilization is the set of techniques used to improve weak soil when removing it is impractical or too costly. The common options are lime, cement, fly ash, or asphalt-emulsion treatment, geotextile separation fabric, and geogrid reinforcement. Each fits a different condition: chemical treatment changes the soil itself, a geotextile keeps fine soil from pumping up into the clean stone base, and a geogrid spreads wheel loads across a wider area of weak ground. The right choice depends on the soil type, moisture, the depth of the problem, and what the pavement will carry.
For property owners, the accountable point is that the proposal should say how soft or unsuitable areas will be handled and how that work will be priced if the full extent is not known until excavation. Stabilization is not a substitute for drainage or for removing organic material; it is a tool for building a stable platform where undercutting alone does not make sense.
Return to Page Index%20What%20Proof%20Rolling%20Reveals.webp)
PCAA made this image for public use under the Creative Commons Attribution (CC BY) license.
Proof rolling means driving a loaded vehicle or construction equipment over the prepared subgrade while observing deflection, rutting, pumping, or soft areas. It is a practical field method, often used with engineering judgment, to identify unstable support before covering it with a base. Proof rolling should be done carefully because overloading a wet or fragile subgrade can damage it. Still, when properly used, it can reveal problems that are not obvious from surface appearance.
Acceptance should be based on stability, grade, moisture condition, compaction, and cleanliness. The subgrade should be shaped to the planned elevation, free of unsuitable material, firm under construction traffic, and ready to support the aggregate base. Once this stage is accepted, the base can be placed with much lower risk.
Return to Page Index%20Why%20a%20Base%20Course%20Matters.webp)
PCAA made this image for public use under the Creative Commons Attribution (CC BY) license.
%20What%20Happens%20Before%20the%20Asphalt%20Truck%20Arrives.webp)
PCAA made this image for public use under the Creative Commons Attribution (CC BY) license.
With the native subgrade stabilized, the focus shifts to building the structural workhorse of your pavement system: the aggregate base. This critical phase involves spreading and compacting a meticulously engineered layer of crushed stone or gravel directly over the prepped soil. The aggregate base serves two vital functions: it acts as a load-distribution platform that spreads heavy vehicle weight evenly to prevent the asphalt from rutting, and it provides a porous pathway for water to drain away safely. Cutting corners or thinning out this layer is the number-one cause of rapid structural failure, shifting, and severe alligator cracking.
The Load-Bearing Reality: Asphalt itself is a flexible pavement; it relies entirely on the interlocking strength of the compacted crushed stone base beneath it to stay flat, rigid, and supportive under heavy daily traffic.
During this phase of construction, an experienced paving crew closely manages three critical execution variables:
Material Specification & Depth: Utilizing the correct gradation of dense-graded aggregate laid at a precise thickness — typically ranging from 4 to 8 inches for standard parking lots and up to 12 inches or more for heavy-duty commercial loading docks.
Precision Base Grading: Blading and smoothing the stone to mirror the final surface slope, ensuring that sub-surface moisture naturally migrates toward catch basins and away from the pavement edges.
Vibratory Compaction & Moisture Tuning: Rolling the aggregate with heavy vibratory compactors at the optimum moisture level to achieve strict density targets, locking the stone particles tightly together to eliminate future settling.
The aggregate base is a compacted layer of crushed stone, crushed gravel, or other specified granular material placed between the subgrade and asphalt. It provides structural support, distributes loads, helps create the final shape, and can assist drainage when designed with the proper gradation and outlets. The base is one of the true foundations of asphalt pavement. A surface course without sufficient base support may crack or deform even if the asphalt mix itself is acceptable.
Aggregate base should not be treated as random stone. Gradation, angularity, fines content, durability, and moisture condition all affect compaction and performance. Dense-graded base contains a range of particle sizes that can lock together and compact tightly. Open-graded drainage layers are designed differently and require outlets to prevent trapped water. The correct material depends on the pavement design and local specifications [1], [6], [12].
Base thickness varies with traffic, subgrade strength, climate, and pavement design. A residential driveway on stable, well-drained soil may need a different base depth than a commercial entrance or truck route. There is no accountable universal answer to “how many inches of stone?” without knowing the site. What is accountable is requiring the estimate to state the compacted base thickness and material type. On many southeast Wisconsin lots, the presence of clay subgrade and seasonal frost typically pushes residential base thicknesses higher than a generic national average would suggest.
Owners should be cautious when comparing bids that list different base thicknesses or omit base work entirely. One contractor may be pricing an overlay. Another may be pricing full reconstruction with new aggregate. Those are not equivalent scopes. The cheaper number may simply exclude the structural work that makes the pavement last.
Aggregate base should be placed in lifts thin enough for the compaction equipment to work through the layer. A thick, loose pile rolled on top may appear compacted at the surface while remaining loose below. Lift thickness depends on material, equipment, and specification. Larger rollers can compact thicker lifts than small plate compactors, but no equipment can fix careless placement. The crew should spread, shape, moisture-condition if needed, and compact each lift.
Moisture matters for aggregate as it does for soil. Many dense-graded bases compact better with enough moisture to help fines bind without becoming unstable or pumping. If the material is too dry, it may not knit together well. If too wet, it may shove, rut, or lose bearing capacity. Experienced crews recognize these conditions, but larger projects may require density and moisture testing.
The finished base grade controls asphalt thickness and surface drainage. If the base is high, the asphalt may be too thin. If the base is low, asphalt quantities rise, and the mat may cool differently. If the base has low areas, the asphalt surface may mirror those imperfections or require inconsistent thickness to correct them. Proper base grading creates a uniform platform so the asphalt can be placed at the intended depth.
Fine grading is especially important at transitions: garage aprons, sidewalk tie-ins, curb lines, utility covers, drainage inlets, and existing pavement edges. These points control how the finished job feels to vehicles and pedestrians. They also affect whether water drains or ponds. A surface can look good from a distance, but fail functionally at transitions if base elevations are not carefully set.
Base compaction turns loose aggregate into a structural layer. The original draft states the principle well: a loose base is not a base; it is material waiting to shift. Field specifications often require a target density tied to a laboratory compaction standard or use proof rolling and visual acceptance for smaller work. Larger projects may use nuclear gauge testing, sand cone testing, or other methods.
The owner can ask simple, useful questions: What base material will be used? How thick will it be after compaction? Will it be compacted in lifts? How will soft spots be handled? Will the finished base be proof-rolled before the asphalt? The answers reveal whether the contractor is thinking structurally or only cosmetically.
Return to Page Index%20Hot%20Mix%20vs.%20Warm%20Mix%20vs.%20Cold%20Mix.webp)
PCAA made this image for public use under the Creative Commons Attribution (CC BY) license.
With a rock-solid, perfectly graded foundation beneath you, it is finally time to focus on the asphalt itself. Real asphalt isn't just generic “blacktop” — it is a highly customized, temperature-sensitive composite material engineered for specific performance traits. Getting this phase right requires an exact alignment between engineering specifications, factory-floor plant production, and precise logistics. If the wrong mix design is chosen, or if the material cools too much during transit, the structural integrity of the entire pavement system is compromised before it even hits the ground.
The Race Against the Thermometer: Hot-mix asphalt (HMA) is a perishable asset. The absolute moment it is mixed at the plant, a literal countdown begins. Success depends entirely on getting that mix to your site and laying it down while it is still hot enough to achieve maximum density.
This critical manufacturing and logistics phase is divided into three interconnected steps:
Custom Mix Selection: Determining the optimal aggregate sizing and liquid asphalt binder content for your project. This typically involves choosing a coarse binder course (the high-strength lower layer designed to distribute heavy loads) and a fine-graded surface course (the smooth, tightly sealed top layer that resists water intrusion and weathering).
Precision Plant Production: Manufacturing the asphalt at local plants where aggregates are thoroughly dried, weighed, and heated to exact temperatures — typically between 275°F and 325°F — before being coated uniformly with liquid asphalt cement under strict quality-control standards.
Insulated Delivery Logistics: Coordinating a continuous fleet of insulated dump trucks covered with heavy-duty tarps. This maintains the essential mix temperature and prevents thermal segregation (cold spots forming on the outer crust of the load), ensuring the material arrives at your property in a perfectly uniform, highly workable state.
Return to Page Index%20Decoding%20Asphalt%20Mix.webp)
PCAA made this image for public use under the Creative Commons Attribution (CC BY) license.
Asphalt mixture is a combination of aggregates, asphalt binder, air voids, and sometimes recycled materials, fibers, anti-stripping additives, polymers, warm-mix technologies, or other modifiers. Mix design is not just “blacktop.” It is a controlled material designed for traffic, climate, layer thickness, durability, workability, and surface texture. Superpave mix design, Marshall methods, and agency specifications all aim to balance stability, durability, void structure, and constructability [7], [9], [14], [15], [16]. On Wisconsin projects, mix selection should also consider Wisconsin DOT specifications and the state's wide temperature range. A single year can see surface temperatures below zero in January and above 130 degrees on a July parking lot.
For property owners, mix selection usually appears in the proposal as a local surface mix, binder mix, base mix, or state-approved designation. A driveway may use a smaller nominal maximum aggregate size for a smoother finish. A heavier-duty area may require a coarser binder course below the surface. A thin overlay requires a mix appropriate for thin placement. Using the wrong mix in the wrong thickness can make compaction difficult or reduce durability.
Return to Page Index%20Asphalt%20Binder%20Grades%20and%20Wisconsin%20Climate.webp)
PCAA made this image for public use under the Creative Commons Attribution (CC BY) license.
The asphalt binder coats aggregate particles and provides flexibility, adhesion, and weather resistance. The aggregate skeleton provides much of the load-carrying structure. Binder grade is selected for climate and traffic, so the mixture resists rutting in heat and cracking in cold conditions. Aggregates must be durable, properly graded, and compatible with the binder. Moisture susceptibility can be a concern when the asphalt binder does not adhere well to aggregate in the presence of water. It is why some mixtures use anti-stripping additives or hydrated lime, depending on local practice [14], [15].
This matters because quality is not just about thickness. A thick layer of poorly designed or poorly produced mix can still rut, ravel, or crack. A well-designed mix placed at the wrong temperature or compacted poorly can also fail. Material design and construction quality must work together.
Return to Page Index%20Where%20Asphalt%20Loses%20Heat.webp)
PCAA made this image for public use under the Creative Commons Attribution (CC BY) license.
Asphalt mix is produced at an asphalt plant and delivered hot enough to be placed and compacted. Temperature depends on binder type, mix type, production method, haul time, weather, and project specification. Hot-mix asphalt and warm-mix asphalt have different production and compaction characteristics. The critical field concept is that the crew has a limited window to place and compact the material before it cools below the effective compaction range [2], [3].
Plant mix tickets are useful documentation. They can show mix type, tonnage, production time, and sometimes temperature or truck identification. On small residential work, owners may not receive extensive testing data, but a contractor should still know where the mix is coming from and what type is being placed. On commercial work, mix tickets and approved job mix formulas may be part of the project record.
The paving operation works best when production, trucking, paving, and rolling are balanced. Too few trucks can starve the paver, causing stops and starts that lead to bumps, segregation, and temperature variations. Too many trucks can create waiting time, allowing the mix to cool. Long hauls, traffic delays, cold weather, wind, and thin lifts all reduce the time available for compaction [3].
Even on a small driveway, coordination matters. The crew should be ready when the trucks arrive. The base should be accepted. Tools should be prepared. Edges should be set. Work areas should be planned. Asphalt that sits too long in a truck or is spread slowly in cold conditions becomes harder to compact. Good crews make the visible placement look simple because the planning has already happened.
Return to Page Index%20What%20Segregation%20Looks%20Like.webp)
PCAA made this image for public use under the Creative Commons Attribution (CC BY) license.
Segregation occurs when coarse and fine particles separate, creating a nonuniform texture and density. Segregated areas may be more permeable, rougher, and less durable. Causes can include poor stockpile handling, improper truck loading, long haul issues, paver operation problems, or excessive hand raking. Contamination occurs when dirt, mud, debris, fuel, oil, or water is mixed into the asphalt or left on the surface before paving.
The owner may notice segregation as streaky texture, coarse patches, or inconsistent appearance. Some texture variation is normal, but obviously coarse, open areas should be questioned. A consistent mat starts with good production and continues through careful delivery and placement.
Return to Page Index%20How%20Tack%20Coat%20Bonds%20Layers.webp)
PCAA made this image for public use under the Creative Commons Attribution (CC BY) license.
As established in our structural overview, asphalt is engineered as a layered pavement system. For these independent lifts to distribute heavy vehicle weight effectively, they must be permanently fused. This section details the critical process of applying a tack coat — a specialized, highly adhesive liquid asphalt emulsion sprayed between the pavement layers. Without meticulous preparation and strong interlayer bonding, individual asphalt layers will shift independently under traffic. This lack of unity leads to delamination, slippage cracks, and rapid structural failure.
The Monolithic Principle: A tack coat acts as the industrial glue that transforms multiple separate lifts of asphalt into a single, thick, monolithic structure. Skipping or under-applying this adhesive layer guarantees that your pavement remains structurally weak, leaving it highly vulnerable to shifting and cracking.
To secure an unbreakable physical bond between the layers, an expert paving crew manages several strict quality-control measures:
Aggressive Mechanical Sweeping: Utilizing high-powered brooms, rotary brushes, or air blowers to eliminate dirt, dust, and loose aggregate. Applying a tack coat over a dusty surface means the adhesive will stick to the dust rather than the underlying pavement, completely ruining the bond.
Precision Spray Calibration: Adjusting the distributor truck’s spray bar and nozzle pressure to achieve a perfectly uniform application rate. This prevents “streaking” (which leaves unbonded dry spots) and “puddling” (excess liquid asphalt that can bleed through and soften the new top layer).
Managing the “Break” and Cure Time: Allowing the applied emulsion sufficient time to lose its water content. This is a critical chemical transition known as “breaking,” where the material visibly shifts from a muddy brown liquid to a highly tacky, shiny black adhesive before the next hot-mix asphalt layer is paved over it.
Tack coat is a thin application of asphalt emulsion or asphalt binder used to bond asphalt layers or bond new asphalt to an existing asphalt surface. FHWA tack coat guidance emphasizes that pavement layers should act together structurally; poor bonding can allow slippage, delamination, fatigue cracking, and reduced pavement performance [4]. This step can look minor because it is thin and often applied quickly, but it is important when the paving plan depends on layers acting as one system.
If a new overlay is placed on an old surface without adequate bonding, the top layer can move independently under braking, turning, or thermal forces. Slippage cracks, crescent-shaped cracks, and delamination can appear. Bonding is especially important at intersections, steep grades, curves, parking lots with tight turns, and areas exposed to shear forces.
Tack coat is not a substitute for cleaning. Dust, loose aggregate, mud, vegetation, standing water, and debris interfere with adhesion. Milled surfaces should be swept thoroughly. Existing asphalt should be cleaned. Concrete surfaces, where allowed by design, require special attention because bonding asphalt to concrete involves different surface and movement considerations. Oil spots or fuel contamination may require removal or treatment.
Surface condition affects the application rate. A tight, smooth existing asphalt surface may require a different residual tack rate than a milled or open-textured surface. Excess tack can track onto tires or create slippage. Too little tack can fail to bond. The correct rate depends on surface texture, material, and specification [4]. The accountable point for owners is that tack coat should be applied intentionally, not skipped because it is inconvenient, or sprayed randomly without surface preparation.
Return to Page Index%20How%20Tack%20Coat%20Breaks%20and%20Cures.webp)
PCAA made this image for public use under the Creative Commons Attribution (CC BY) license.
Asphalt emulsion tack contains water that must break and cure enough to leave asphalt residue for bonding. If paving occurs too soon over unbroken emulsion, the water can interfere. If traffic drives over tack before paving, it can track off or become contaminated. Weather affects break time; cool, humid, or shaded conditions may slow it. Some modern trackless tack materials are designed to reduce tracking, but they still require proper use.
The crew should coordinate tack application with the paving sequence. Applying tack far ahead of the paver can expose it to dust and traffic. Applying too little or too late can compromise bonding. Good work looks controlled: clean surface, uniform spray, protected tack, and timely paving.
Joints are common weak points in asphalt pavement. Longitudinal joints, transverse joints, utility patches, and tie-ins to existing pavement all require attention. The joint area is often cooler, thinner, or harder to compact than the center of the mat. If joints are poorly bonded or poorly compacted, water can enter, and cracks can begin. Joint construction guidance in paving manuals emphasizes proper overlap, vertical faces, sufficient material, and rolling patterns [2], [3].
For owners, joints should be straight, tight, and aligned with a logical paving sequence. A cold joint should not be a loose feathered edge. Tie-ins should be cut or milled to create enough depth for the new asphalt. Edges should be compacted and supported. These details may be less dramatic than the main paving pass, but they often determine where deterioration begins.
Not every step of every project requires tack coat, but overlays and multiple asphalt lifts commonly do. Proposals should state whether tack is included. If a contractor says tack is unnecessary, the owner can ask why. There may be a valid reason in a specific application, but the answer should reflect pavement practice, not shortcut thinking.
Return to Page Index%20The%20Wisconsin%20Paving%20Season.webp)
PCAA made this image for public use under the Creative Commons Attribution (CC BY) license.
With the foundation stable and the tack coat cured, the most visible and satisfying phase of the project begins. This section covers the physical laying of the hot-mix asphalt. This is the precise mechanical process where a self-propelled paving machine accepts the heated material from delivery trucks, distributes it uniformly across the prepared base, and pre-compacts it into a smooth, level mat. Delivering a flawless surface requires absolute synchronization between the speed of the paver, the flow of material, and the manual skill of the crew operating the screed.
The Precision Factor: Asphalt must be laid at a uniform thickness that accounts for “fluff,” meaning it is placed roughly 25% thicker than the final target depth because the heavy rollers will compress it down significantly during the upcoming compaction phase.
To ensure a seamless, high-durability asphalt mat, the paving crew must master several critical variables during installation:
Continuous Paver Operation: Maintaining a steady, uninterrupted forward speed. If the paving machine stops to wait for the next dump truck, the material inside the hopper begins to cool, creating localized temperature drops that cause surface blemishes and structural weak points.
Automated Grade and Screed Controls: Utilizing electronic grade sensors to dynamically adjust the paver’s floating screed. This ensures the asphalt matches the exact design elevations and drainage slopes established in the preconstruction phase.
Flawless Joint Management: Meticulously executing longitudinal and transverse joints where parallel passes of the paver meet. The crew must tightly interlock these seams while the material is hot to prevent weak, high-permeability lines that later split into long linear cracks.
By the time asphalt placement begins, the site should already be ready. The base or milled surface should be accepted. Drainage structures and utility covers should be adjusted or scheduled for adjustment. Edges and transitions should be established. Tack coat should be cured and protected where needed. Equipment should be staged. The crew should know the paving pattern and where joints will fall.
Asphalt placement is often treated as the main event because it is visible, but it depends on everything before it. Placing asphalt on an unstable base, a dirty surface, or a poorly graded platform simply hides problems temporarily. The paver and crew should not be expected to solve design and preparation mistakes at the last moment.
Return to Page Index%20Lift%20Thickness%20vs.%20Aggregate%20Size.webp)
PCAA made this image for public use under the Creative Commons Attribution (CC BY) license.
Asphalt thickness should be discussed as compacted thickness. Loose asphalt placed by a paver compacts under rolling, so the loose mat is thicker than the finished layer. If a proposal states a final thickness, the crew must place enough loose material to achieve it after compaction. Lift thickness should also be compatible with the mix size. Coarse mixtures placed too thin can be difficult to compact and may create texture problems. Fine mixtures placed too thickly may not provide the structural role intended for a binder layer.
Thickness affects performance and cost. Too thin, and the pavement may crack or ravel early. Too thick in a single lift, and it may be difficult to compact uniformly, or it may be an inefficient use of a surface mix. Larger projects may check thickness by cores. Smaller projects may rely on yield calculations, elevation checks, and crew control. Either way, the owner should know what thickness is being installed.
Pavers produce the smoothest mat when they move steadily. Stops and starts can create bumps, tears, changes in texture, or temperature differentials. Proper truck exchange, consistent head of material, correct screed settings, and balanced delivery help produce uniform placement [3]. On small jobs, some stopping is unavoidable, but careless stop-start paving can still reduce quality.
Handwork is necessary around edges, corners, garages, utility covers, drains, and tight areas. However, excessive hand raking can segregate the mix and create an inconsistent texture. Skilled crews use handwork carefully and compact those areas promptly because they cool faster than large machine-placed areas.
Return to Page Index%20Bad%20Transitions%20vs%20Good%20Transitions.webp)
PCAA made this image for public use under the Creative Commons Attribution (CC BY) license.
Transitions are where the finished pavement meets something else: a garage slab, sidewalk, street, curb, drain, loading dock, concrete apron, or existing asphalt. Poor transitions create bumps, trip hazards, snowplow impacts, ponding, and edge raveling. A good transition is not just smooth; it is also thick enough to resist breaking. Feathering asphalt to a paper-thin edge often leads to early cracking and raveling. Milling, saw cutting, or excavation may be needed to create enough depth at tie-ins.
Drainage details during placement include keeping water moving to inlets, swales, or edges without creating birdbaths. Crews often use rakes, lutes, and paver adjustments to refine the mat, but they cannot overcome a fundamentally wrong grade. Final surface shape should match the drainage plan from Step 2.
Return to Page Index%20%20When%20Asphalt%20CanCan_t%20Be%20Paved.webp)
PCAA made this image for public use under the Creative Commons Attribution (CC BY) license.
Weather affects asphalt placement. Cold air, cold ground, wind, thin lifts, and long haul times all accelerate cooling. Rain can prevent proper bonding and compaction. Excessive heat can create safety concerns and affect working time differently. Many agencies restrict paving based on surface temperature, air temperature, season, precipitation, and lift thickness. The specific threshold depends on the specification and mix [2], [3]. For Wisconsin, this typically narrows the reliable paving season to roughly mid-April through October, with the most stable conditions falling in May through September. Paving outside that window requires extra attention to surface temperature and weather forecasts.
Owners should be cautious about paving during unsuitable weather simply to meet a schedule. A short delay can be better than placing asphalt that cannot be compacted properly. The contractor should be able to explain how weather conditions affect the job.
Return to Page Index%20Compaction%20The%20Hidden%20Sign%20of%20Quality.webp)
PCAA made this image for public use under the Creative Commons Attribution (CC BY) license.
Once the hot-mix asphalt is laid, the clock is ticking to execute the single most critical quality-control step in the entire paving process. Compaction and density control are where your pavement achieves its actual structural strength and water resistance. Freshly placed asphalt naturally contains loose air voids; without massive, immediate mechanical pressure applied while the mix is still hot, the aggregate particles cannot interlock. Failing to hit precise density targets leaves the pavement highly permeable, allowing water to easily seep into the interior layers and trigger rapid stripping, severe freeze-thaw damage, and a drastically shortened lifespan.
The Structural Reality: Compaction is not cosmetic “finishing work” designed to make the surface look smooth — it is a mandatory engineering step. Achieving precise density targets is what transforms a loose, perishable hot-mix layer into a rock-hard, impermeable pavement shield capable of supporting decades of heavy traffic.
To hit strict engineering density targets before the material cools and locks into place, a professional rolling crew coordinates a precise, three-stage rolling pattern:
Breakdown Rolling: Operating heavy steel-wheeled vibratory rollers directly behind the paving machine. This initial pass must happen while the asphalt is at its peak temperature — typically between 220°F and 250°F — to achieve the vast majority of the required structural density.
Intermediate Rolling: Employing pneumatic (rubber-tired) rollers to knead the hot aggregate particles together. This mechanical action seals the internal surface pores and eliminates early micro-fissures while the asphalt binder is still highly workable.
Finish Rolling and Density Verification: Utilizing static steel rollers at the tail end of the cooling process to smooth away any remaining roller marks. Simultaneously, quality-control technicians use specialized density gauges (such as nuclear or electromagnetic gauges) to test the surface in real time, verifying the compaction meets common industry ranges before traffic is allowed on the surface.
Compaction is one of the most important steps in asphalt paving. It reduces air voids, increases density, locks aggregate particles together, improves strength, reduces permeability, and improves durability. The original draft correctly identifies compaction as a hidden sign of a serious paving job. Asphalt that is not compacted enough may look acceptable at first, but it can allow more air and water into the pavement, accelerating oxidation, moisture damage, raveling, and cracking.
Laboratory mix design usually targets a certain void structure, and field construction aims for a practical density range. Many specifications express density as a percentage of theoretical maximum density, often called Gmm, or as a percentage of a laboratory bulk density. Exact requirements vary by agency, mix, layer, and project, but field density is one of the most common asphalt quality measures [10], [11], [15], [16]. On smaller private jobs, formal density testing may not be included, but the physical principle remains the same.
Return to Page Index%20The%20Compaction%20Temperature%20Window.webp)
PCAA made this image for public use under the Creative Commons Attribution (CC BY) license.
Asphalt must be compacted while it is still hot and workable. As the mat cools, the binder stiffens, and aggregate particles become harder to rearrange. Most of the density a pavement will ever have is gained in the first few minutes after placement, which is why the breakdown roller works directly behind the paver rather than waiting for a convenient moment. Rolling too late can crush aggregate without gaining density. Rolling too aggressively too early can shove, check, or crack a tender mix. The crew's job is to stay inside the window between those two failures [2], [3].
How long that window stays open depends on the mix temperature leaving the plant, haul time, lift thickness, base temperature, air temperature, wind, and sun. A thin lift on a cold base can drop below the effective compaction range in minutes; a thick lift on a warm summer day stays workable far longer. This is why crews delay paving in poor weather, keep trucks covered, and refuse to let a load sit while the paver waits. The Wisconsin paving season and the weather limits discussed earlier exist for this reason.
For property owners, the visible sign of a crew that respects the window is simple: rollers moving continuously behind the paver, not parked while hot mat cools on the ground. Handwork areas, patches, and joints should be compacted promptly for the same reason — small areas lose heat fastest.
Return to Page Index%20The%20Three%20Roller%20Passes.webp)
PCAA made this image for public use under the Creative Commons Attribution (CC BY) license.
Compaction commonly includes three stages. Breakdown rolling happens at peak temperature, usually with a steel-drum roller, and achieves most of the required density. Intermediate rolling, often with a pneumatic or a second steel-drum roller, continues the density gain and kneads the surface tight while the binder is still workable. Finish rolling, with a static steel drum near the end of the cooling curve, removes roller marks and produces the final surface texture. Paving manuals describe each stage, the overlap between passes, and the pattern used to keep the mat uniform [2], [3].
Pattern matters as much as equipment. Rollers should overlap each pass, work from the low side of the mat toward the high side so the hot mix is not pushed downhill, and never stop or turn sharply on hot asphalt, which leaves depressions and marks that cannot be rolled out later. Vibration is a tool, not a default: it helps on thicker lifts and stiffer mixes and can damage thin lifts, tender mixes, and the areas over utility structures.
An owner does not need to count passes. What is worth noticing is whether the rolling pattern looks planned and repeated across the whole job, whether the surface is uniform in texture from edge to edge, and whether the crew finishes with a static pass that leaves no marks. Those are the outward signs of a compaction plan rather than an afterthought.
Return to Page Index%20Why%20Joints%20Fail%20First.webp)
PCAA made this image for public use under the Creative Commons Attribution (CC BY) license.
Joints and edges are the hardest parts of a mat to compact, and they are where most asphalt failures begin. A joint cools faster than the center of the mat because it is exposed on one side, and an unconfined edge has nothing to push against, so the mix spreads sideways instead of densifying. Low density at a joint lets water in, and water plus freeze-thaw turns a hairline seam into a crack that runs the length of the pavement. Joint construction guidance in paving manuals emphasizes proper overlap, vertical faces, enough material at the joint, and a rolling pattern that pinches the joint from the hot side [2], [3].
Confined areas need the same care in a different way. Around garage aprons, utility covers, drains, corners, and tight spots the paver cannot reach, the crew places mix by hand and compacts it with plate compactors or small rollers. Because these areas are small they lose heat quickly, so they must be compacted immediately, not after the main mat. Excessive raking in these spots can also segregate the mix, so skilled crews keep handwork to a minimum and lute rather than rake wherever possible.
Edge support finishes the job. An asphalt edge with no shoulder, curb, or compacted aggregate beside it will crumble under the first tire that drops off it. Where a curb does not exist, the edge should be backed with compacted material so it stays confined in service, not just on paving day.
Return to Page Index%20Air%20Voids%20and%20Pavement%20Life.webp)
PCAA made this image for public use under the Creative Commons Attribution (CC BY) license.
Commercial, municipal, and engineered projects often require density testing. Field density is measured with nuclear density gauges, non-nuclear electromagnetic gauges, or cores taken from the finished mat, and the result is compared with a laboratory reference value — usually the theoretical maximum density of the mix. ASTM D2950 covers nuclear field testing and ASTM D2041 covers the laboratory reference value, and most specifications express the requirement as a percentage of that maximum, often in the low-to-mid nineties depending on the agency and the layer [10], [11], [15], [16].
Testing is only useful if the project says who does it, when, and what happens when a result falls short. On a specified job, the owner or engineer should receive the test locations and results, and the contractor should know before paving whether a failing area will be re-rolled, cored, or replaced. Testing after the crew has left cannot fix a cold mat.
Residential driveways rarely include formal density testing, and that is normal. The practical indicators are the ones described in the sections above: a rolling pattern that stays behind the paver, a uniform surface texture, tight joints, and no soft or spongy spots when the pavement is walked after cooling. If a contractor offers density numbers on a driveway, ask what they were measured against; if a contractor cannot describe how compaction was controlled at all, that is the more important answer.
Return to Page Index%20Why%20Water%20Ponds%20on%20Your%20Lot.webp)
PCAA made this image for public use under the Creative Commons Attribution (CC BY) license.
The finished surface should be judged on function, not appearance. Surface drainage, joint tightness, edge support, transition smoothness, utility structure alignment, and uniform texture all matter more than a fresh black color that will fade within a season. A pavement that looks great but ponds water has not actually been finished, because standing water is the starting point for most of the failures described in this guide.
The most useful inspection is a walk after a rain, or a hose test on suspect areas before final acceptance. Water should leave the surface along the paths planned in the design stage and should not collect against the garage, at the street tie-in, around utility covers, or in the birdbaths a paver can leave at stops and starts. Downspouts should discharge where they were meant to, and drains and inlets should sit at grade so water actually reaches them.
Before signing off, the questions that protect the driveway are direct ones: Where does water go from every part of this surface? Where does it leave the property? What happens at the garage threshold and at the street? Which low spots were corrected and which were accepted, and why? A contractor who planned the drainage will answer without hesitation. Correcting a grade problem after the asphalt is down means cutting out and replacing pavement, so this is the last cheap moment to ask.
Return to Page Index%2BAfter%2BNew%2BInstall%2B-%2BThe%2BComplete%2BCare%2BGuide-640w.webp)
PCAA made this image for public use under the Creative Commons Attribution (CC BY) license.
New asphalt should not be treated like fully aged pavement on day one. When vehicles can return depends on the mix, lift thickness, weather, and vehicle type. Passenger vehicles are usually allowed back sooner than heavy trucks, and hot weather keeps a fresh mat tender for longer because the binder stays soft. The contractor should give a specific answer for the job rather than a generic number, and the answer may differ for the driveway, the loading area, and the dumpster pad.
The loads that mark new asphalt are rarely the ones owners expect. Normal driving is usually fine within the stated period; concentrated point loads are not. Trailer tongue jacks, motorcycle kickstands, dumpster wheels, lawn-equipment ramps, and the sharp turning of a heavy vehicle while it is standing still all press a small footprint into a surface that has not finished curing. Where those loads cannot be avoided, a board or plate under the contact point spreads the weight.
Early care also means keeping the surface clean of fuel and oil drips, which soften asphalt, and keeping water moving off it while any final grading of adjacent lawn or shoulders is finished. A good contractor puts this guidance in writing at the handoff, along with when sealcoating should first be considered — typically not until the pavement has cured through a season, because sealing too early traps oils that need to escape.
Return to Page Index%20The%20Paving%20Job%20Documentation%20Pack.webp)
PCAA made this image for public use under the Creative Commons Attribution (CC BY) license.
Keep the proposal, every change order, the invoices, mix tickets if they were provided, the written warranty terms, photographs of the work in progress, and the maintenance and early-care instructions. Together they are the record of what was built. If a question arises later about thickness, base depth, drainage, or warranty coverage, that record is what settles it, and it is far easier to assemble on the day the crew leaves than two winters later.
Photographs deserve special mention because they capture the layers that are invisible once the surface is down. Pictures of the exposed subgrade, the compacted base with a depth check, the milled or cleaned surface before tack, the tack coat itself, the edges and tie-ins before paving, and the rolling in progress cost nothing and document the parts of the job that determine its life. The owner can take them, or the contractor can supply them as part of the handoff.
Documentation also protects the contractor. A written scope, a recorded base and asphalt thickness, and a warranty that states its duration, what it covers, and what voids it leave far less room for dispute than memory does. The accountability data points listed at the start of this guide are the checklist for what that record should contain.
Return to Page Index%2BThe%2BCost%2Bof%2BDoing%2BNothing-640w.webp)
PCAA made this image for public use under the Creative Commons Attribution (CC BY) license.
New asphalt needs maintenance. Oxidation, ultraviolet light, water, traffic, snowplows, deicing salts, and seasonal movement all work on the surface from the first season. Maintenance is not a sign that something went wrong; it is how a pavement reaches the life it was designed for. It can include sweeping, keeping drains and inlets clear, sealing cracks while they are still narrow, sealcoating where appropriate, patching isolated failures, and an overlay when the surface has worn but the structure below is still sound [18].
Timing is the whole point. Pavement preservation guidance treats each treatment as effective only within a window: crack sealing works on a crack that has not yet let water into the base, sealcoating protects a surface that has not yet raveled, and an overlay saves a pavement whose base has not yet failed. Once water has been in the base through a Wisconsin winter, the cheap options are gone and the conversation moves to full-depth repair or reconstruction. Doing maintenance before distress becomes severe is far cheaper than rebuilding.
A practical plan for a driveway or small lot is to walk it every spring and fall, clear the drainage paths, seal cracks as they appear, and consider sealcoating on a cycle suited to the traffic and exposure rather than on a sales call's schedule. For a commercial lot, a simple written plan with a yearly inspection, a crack-sealing budget, and a projected overlay year keeps the pavement off the emergency list.
Return to Page IndexIMAGE: The handoff — what a good contractor walks the owner through when the job is done (infographic to be placed)
PCAA made this image for public use under the Creative Commons Attribution (CC BY) license.
The finished surface is not the only thing that tells you whether you hired the right contractor. A good contractor walks the owner through the completed work, explains how the drainage was built and where water will go, gives written care instructions, names the warranty limits plainly, and stays reachable after the last truck leaves. A weak contractor disappears as soon as the surface looks acceptable. Accountability continues through the handoff, and it is part of what the price paid for.
The evaluation is easier if it uses the same items the job was scoped on. Was the base placed at the compacted thickness in the proposal? Was the asphalt placed at the compacted thickness in the proposal? Was tack applied where the scope said it would be? Were soft spots handled the way the change-order terms described? Were the edges supported and the transitions cut in, not feathered? Each of those has a yes-or-no answer that the record from the previous section can back up.
The first spring is the real test. A pavement built on the sequence in this guide comes through its first freeze-thaw cycle without heaving, ponding, or edge breakdown. If problems appear, the warranty conversation goes better when the scope, the photographs, and the thickness records exist — and it goes better still with a contractor who is still answering the phone.
Return to Page Index%20The%20Owner%20Accountability%20Checklist.webp)
PCAA made this image for public use under the Creative Commons Attribution (CC BY) license.
This checklist summarizes the measurable, reviewable items that make a paving project accountable. Use it before signing, while the work is open, and after the crew leaves.
Project definition: the written scope states what the pavement will carry, the removal depth, and which areas get a heavier section.
Drainage decisions: the proposal explains where water will go, which low spots are corrected, and how the pavement meets the garage, the street, and any drains.
Base thickness: compacted base depth and material type are stated, along with how soft spots and unsuitable soil will be handled and priced.
Asphalt thickness and mix: compacted asphalt thickness, number of lifts, and the mix type are named, and tack coat is included wherever there is an overlay or a second lift.
Compaction approach and testing: the proposal says how the base and the asphalt will be compacted and who, if anyone, will test density and thickness.
Subgrade accepted: the exposed ground was proof-rolled or inspected and soft areas were corrected before base went down.
Base measured: the compacted base depth was checked and the finished base was graded to drain.
Surface prepared: milled or existing surfaces were swept clean and tack coat was applied and allowed to break before paving.
Placement and rolling: the paver kept moving, rollers stayed directly behind it, joints and edges were compacted while hot, and transitions were cut in rather than feathered.
Photographs taken: subgrade, base, edges, tack, and tie-ins were photographed before the asphalt covered them.
Drainage verified: the surface was checked after rain or with a hose, and no water stands against structures or in the mat.
Documentation received: proposal, change orders, invoices, mix tickets if available, warranty terms, and care instructions are in hand.
Handoff completed: the contractor walked the finished work, explained early-service limits, and remains reachable.
If any line on this list cannot be answered, that is the item to raise with the contractor now, while the answer is still cheap.
Return to Page Index%20Reading%20Your%20Pavement%20What%20Distress%20Patterns%20Mean.webp)
PCAA made this image for public use under the Creative Commons Attribution (CC BY) license.
Different distress patterns point to different causes, and identifying the cause matters more than covering the symptom. A surface treatment applied over a structural problem buys a season at most. The patterns below are the ones property owners see most often, with the cause each usually indicates.
Ponding or birdbaths: usually a grade problem — low spots left in the base or the mat, or a surface that was never sloped to an outlet. Water standing on asphalt is the starting point for most of the failures below.
Alligator cracking: interconnected cracks that look like reptile skin usually mean fatigue — the pavement is flexing too much under load because the base or subgrade beneath it is weak, thin, or wet. This is a structural failure, and an overlay over it will crack in the same pattern.
Raveling: a surface that sheds aggregate and turns coarse usually means low compaction, a mix placed too cold, segregation, or moisture damage. It starts at the surface and works down.
Edge cracking and crumbling: usually a support problem — an unconfined edge with no shoulder, curb, or compacted material beside it, often made worse by water eroding the edge.
Rutting or shoving: ruts in the wheel paths or a surface that has moved under braking and turning point to an unstable mix, inadequate compaction, or a weak base or subgrade, and are most common where heavy vehicles turn slowly.
Longitudinal and reflective cracks: straight cracks along a joint usually mean a poorly compacted or poorly bonded joint; cracks that mirror the pattern of an old pavement below are reflective cracking through an overlay.
Potholes: the end stage of water entering cracks and a weakened base breaking up under traffic. A pothole is rarely the problem; it is the evidence of one that started earlier.
Depressions and frost heave: localized settlement usually means unsuitable material, an uncompacted utility trench, or a soft spot that was paved over; heaving in spring means water froze in the base or subgrade.
When a contractor proposes a repair, the question to ask is which of these causes the repair addresses. Crack sealing addresses water entry. Patching addresses a local failure. An overlay addresses a worn surface over a sound structure. Only removal and reconstruction address a failed base. Matching the repair to the cause is the difference between a fix and a delay.
Return to Page Index%2012%20Questions%20to%20Ask%20Before%20You%20Sign.webp)
PCAA made this image for public use under the Creative Commons Attribution (CC BY) license.
These twelve questions cover the pavement section, drainage, thickness, compaction, mix, testing, warranty, and what happens when conditions change. A contractor's willingness, and ability, to answer them is itself a quality signal. None of them requires the owner to be a pavement engineer.
1. What will this pavement be designed to carry, and which areas get a heavier section than the rest?
2. Where will water go from every part of the finished surface, and where does it leave the property?
3. What is being done with the existing pavement — overlay, mill and overlay, patching, or full removal — and why is that the right option for its condition?
4. How will the subgrade be checked and accepted, and what happens if soft or unsuitable material is found?
5. What base material will be used, how thick will it be after compaction, and will it be placed and compacted in lifts?
6. How thick will the asphalt be after compaction, in how many lifts, and what mix will be used for each?
7. Is tack coat included wherever new asphalt meets existing pavement or a previous lift?
8. How will compaction be controlled — what rollers, what sequence, and will density or thickness be tested?
9. How will the edges, transitions, and utility structures be handled so the pavement is supported and drains at the garage, the street, and every cover and drain?
10. How are unforeseen conditions priced — by unit cost, time and material, or negotiated change order — and who approves them?
11. What does the warranty cover, for how long, and what voids it, and will the terms be in writing?
12. What can I expect at the handoff — a walkthrough, care instructions, when traffic can return, and documentation of what was built?
How to use this guide on your project: treat asphalt paving as a sequence of accountable construction decisions, not a one-day surface job. Start with the site, not the asphalt truck. Insist on drainage, subgrade stability, base compaction, and proper bonding before you ever talk about the surface. If a contractor cannot answer the questions above, that is information you can use before you sign.
Return to Page Index[1] Asphalt Institute. The Asphalt Handbook, Manual Series No. 4 (MS-4). Lexington, KY: Asphalt Institute. https://bookstore.asphaltinstitute.org/
[2] Asphalt Institute. Construction of Quality Asphalt Pavements, Manual Series No. 22 (MS-22). Lexington, KY: Asphalt Institute. https://bookstore.asphaltinstitute.org/catalog/book/ms-22-construction-quality-asphalt-pavements
[3] Federal Highway Administration, National Asphalt Pavement Association, and U.S. Army Corps of Engineers. Hot-Mix Asphalt Paving Handbook 2000 (FHWA-RD-01-065). Washington, DC: Federal Highway Administration. https://www.fhwa.dot.gov/publications/focus/01jul/handbook.cfm
[4] Federal Highway Administration. Techbrief: Tack Coat Best Practices. FHWA-HIF-16-017. Washington, DC: U.S. Department of Transportation. https://www.fhwa.dot.gov/pavement/pub_details.cfm?id=981
[5] Federal Highway Administration. Pavement Recycling Guidelines for State and Local Governments. FHWA-SA-98-042. Washington, DC: U.S. Department of Transportation. https://www.fhwa.dot.gov/pavement/recycling/98042/
[6] American Association of State Highway and Transportation Officials. Guide for Design of Pavement Structures. Washington, DC: AASHTO, 1993. https://store.transportation.org/
[7] American Association of State Highway and Transportation Officials. AASHTO M 323, Standard Specification for Superpave Volumetric Mix Design. Washington, DC: AASHTO. https://store.transportation.org/Item/PublicationDetail?ID=4726
[8] American Association of State Highway and Transportation Officials. AASHTO T 99 and AASHTO T 180, Moisture-Density Relations of Soils. Washington, DC: AASHTO. https://store.transportation.org/
[9] ASTM International. ASTM D6927, Standard Test Method for Marshall Stability and Flow of Asphalt Mixtures. West Conshohocken, PA: ASTM International. https://www.astm.org/d6927-15.html
[10] ASTM International. ASTM D2041/D2041M, Standard Test Method for Theoretical Maximum Specific Gravity and Density of Asphalt Mixtures. West Conshohocken, PA: ASTM International. https://www.astm.org/d2041_d2041m-19.html
[11] ASTM International. ASTM D2950/D2950M, Standard Test Method for Density of Asphalt Mixtures in Place by Nuclear Methods. West Conshohocken, PA: ASTM International. https://www.astm.org/d2950_d2950m-22.html
[12] Huang, Y. H. Pavement Analysis and Design. 2nd ed. Upper Saddle River, NJ: Pearson/Prentice Hall, 2004. https://www.pearson.com/store/en-us/p/pavement-analysis-and-design/P200000003346/9780131424739
[13] Mallick, R. B., and El-Korchi, T. Pavement Engineering: Principles and Practice. 3rd ed. Boca Raton, FL: CRC Press, 2018. https://www.routledge.com/Pavement-Engineering-Principles-and-Practice-Third-Edition/Mallick-El-Korchi/p/book/9781498758802
[14] Roberts, F. L., Kandhal, P. S., Brown, E. R., Lee, D. Y., and Kennedy, T. W. Hot Mix Asphalt Materials, Mixture Design, and Construction. 2nd ed. Lanham, MD: National Asphalt Pavement Association Research and Education Foundation, 1996. https://www.asphaltpavement.org/
[15] Brown, E. R., Kandhal, P. S., Roberts, F. L., Kim, Y. R., Lee, D. Y., and Kennedy, T. W. Hot Mix Asphalt Materials, Mixture Design, and Construction. 3rd ed. Lanham, MD: NAPA Research and Education Foundation, 2009. https://www.asphaltpavement.org/
[16] Transportation Research Board. NCHRP Report 673: A Manual for Design of Hot-Mix Asphalt with Commentary. Washington, DC: National Academies Press, 2011. https://nap.nationalacademies.org/catalog/14524/a-manual-for-design-of-hot-mix-asphalt-with-commentary
[17] U.S. Environmental Protection Agency. NPDES Construction General Permit and stormwater discharge permitting guidance. Washington, DC: U.S. EPA. https://www.epa.gov/npdes/2022-construction-general-permit-cgp
[18] Federal Highway Administration. Pavement Preservation Checklist Series and pavement preservation guidance. Washington, DC: U.S. Department of Transportation. https://www.fhwa.dot.gov/pavement/preservation/ppcl00.cfm
Return to Page Index